- Industrial art materials and tools
- Mie
Ise paper stencil printing Ise katagami
Four highly skilled cutting techniques
each with their own charm and history
Description
What is Ise paper stencil printing ?
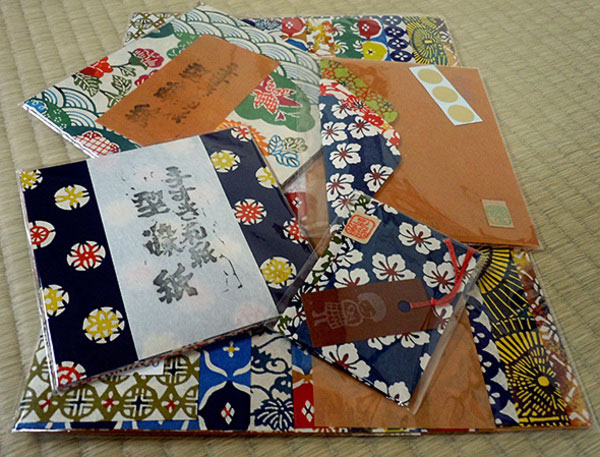
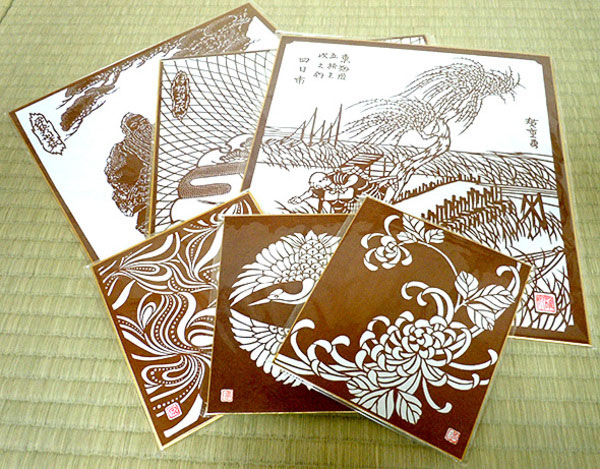
The Japanese name of Ise Paper Stencil Printing is Ise Katagami. Katagami means paper stencil. Today this craft is mostly produced in the city of Suzuka in Mie prefecture. They are an important part of textile dyeing. For many years, such stencils have been crafted in Shiroko of Ise province, current day Suzuka, which is why they have been called Ise Katagami, Ise gata, or Shiroko gata. They are all written using two different Japanese characters which mean "shape" and "pattern". Ise Paper Stencil Printing are made by pasting layers of Mino washi, a Japanese traditional paper, with persimmon tannin for reinforcement. The stiffened paper is used as a base card and stencil designs are hand cut using a variety of minute knives or chisels while applying four types of cutting techniques. The techniques are stripe carving, stab carving, decorative carving and drill carving. One of the key features of this craft is its distinctive finish, carefully and skillfully cut by master craftsmen. Such stencils are used for dyeing designs and patterns on a wide range of kimono, including yuzen, komon (fine patterned), and yukata (summer cotton kimono). Today, the stencils are not only used for dyeing kimono, but also applied to interior decoration such as sliding screens (fusuma) and sliding paper doors (shoji) or even LED lighting as a new approach that is drawing increased attention.
History

Ise Paper Stencil Printing has a long history dating back many centuries and with several different sayings on their origin. According to one theory, stencils already existed by the end of the Muromachi period (1336-1573) as Shokuninzukushie( "A Scene of Various Artisans"), depicted in the Muromachi period, clearly shows artisans engaged in stencil dyeing. In the Edo period (1603-1868), Ise Paper Stencil Printing received the strong patronage of the Kishu domain, and stencil making, centered on the Shiroko and Jike areas, flourished. This area located on Ise Bay was a trading base, which also contributed greatly to its success. In addition to the artistic development through cooperation among artisans, an extensive network soon grew to sell and distribute the stencils all over the country. In the Meiji period (1868-1912), the adoption of Western fashion hit the industry hard, followed by further influence of World War II which resulted in losing most of the stencil makers. However, with the rebirth of the postwar Japanese economy and increasing prosperity, demand for kimono returned and stencil production was once more thriving around the 1960s. Today, due to a decline in the overall demand for kimono, and the spread of new dyeing techniques, the number of stencil makers is decreasing again. In order to ensure the skills would be passed down to future generations, a preservation society to preserve the art of stencil making has been launched. The artistry of the designs is much appreciated resulting in this skill to become an artistic handicraft, and an increasing number of people enjoying stencil making as a hobby.
General Production Process
- 1. Making the base card
Stencils for dyeing require a durable paper that will not expand or shrink. The process starts with the creation of a stencil base card called katajigami. First, 200 to 500 sheets of Mino Japanese traditional paper (washi) are stacked and cut into a standard size.
- 2. Pasting paper
As washi is strong crosswise and weak lengthwise, 3 sheets of paper are alternately pasted with persimmon tannin glue in the order of vertical, horizontal, and vertical to create a strong base. This process is called kamitsuke, which is similar to making plywood. The application of persimmon tannin glue makes the sheets water resistant.
- 3. Drying
The base is left for one to two days to allow the persimmon tannin glue to bond more effectively with the washi, and then the base is laid on a cypress panel and dried in the sun.
- 4. Smoking
The dried base is smoked for about one week in a cedar sawdust smokehouse at a temperature of about 40ºC to help solidify the glue between the washi fibers and create a strong base card resistant to expansion and contraction.
- 5. Completing the base card
The base card is again soaked in persimmon tannin glue, dried in the sun, and returned to the smokehouse. It takes about forty five days for it to turn into a dark brown base card called katajigami and ready for inspection, but it will not be ready for stencil cutting for a further one or two years until it is mature enough.
- 6. Carving
A dyer will request a design artisan to draw a pattern and this will be cut by the stencil maker. There are four cutting techniques, which are stripe carving, stab carving, decorative carving, and drill carving. Stripe carving uses a steel ruler and a thin knife to cut uniform strips. To cut one strip, the same line is traced three times with the knife. A highly skilled craftsman may cut as many as eleven strips within a width of a centimeter. Stab carving is processed by piercing holes vertically towards the five to eight stacked base cards, which is placed on a wooden board. The holes are pierced using a knife with a one millimeter or two millimeter blade. The small knife is pulled toward the body when cutting straight lines and large patterns. This technique is renowned for giving the cut lines a subtle curve, and creating a warm flowing feeling in the final design. Decorative carving is a technique to cut a variety of patterns using tiny blades that are shaped like flowers, fans, and diamonds. This technique is commonly called gottori. Symmetrical patterns and diverse shapes can be expressed. This technique actually begins with the making of the tool, and the quality of the tool greatly affects the completion of the piece. The craftsmen specializing in decorative carving have a huge number of knives with some even owning as many as three thousand. Drill carving uses a semi-circular tip gimlet to drill many tiny circular holes. The holes are drilled by the gimlet held vertically while rotating the gimlet by the fingers to form delicate and incredibly intricate patterns. The stencil using this technique is used for Edo komon kimono. In some works, as many as a hundred holes are cut in an area as small as a one square centimeter, which requires years of practice and considerable endurance with high craftsmanship.
- 7. Reinforcing
Since the cut stencil is used for dyeing, depending on the cutting method it may need reinforcing. There are two reinforcing methods. Shabari involves pasting a fine silk gauze on the stencil with Japanese lacquer (urushi). Ito ire is done to prevent a fine striped pattern from being torn. A silk thread is inserted as reinforcement between two completed stencil sheets. It is applied only for stripe carving stencils. Since the stencils must be perfectly aligned, the artisan needs to be very concentrated. Finally, the completed stencils are delivered to the dyers and used for dyeing kimono.
Where to Buy & More Information
Ise Katagami Shiryokan
-
Address
-
Tel.+81-593-68-0240
-
ClosedMondays (open if Monday is holiday), Tuesdays, 3rd Wednesdays and around the New Year
-
Business Hours10am to 4pm
-
Website


