


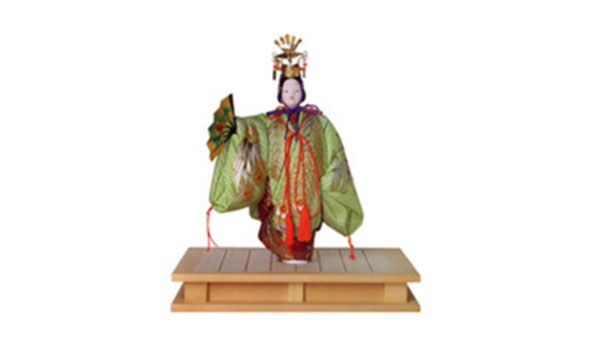
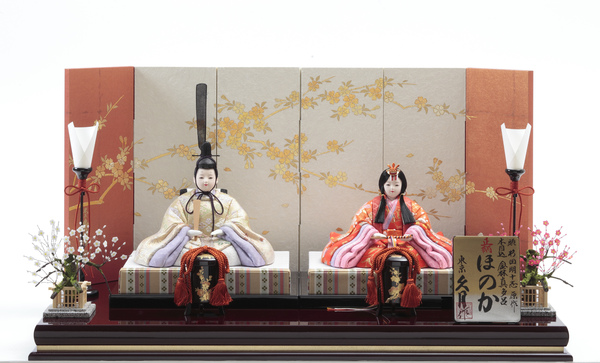
 Photo:Iwatsuki Ningyo cooperative association
- Dolls, kokeshi
- Saitama
Edo Kimekomi Dolls Edo Kimekomi Ningyo
Dolls in harmony with modern life
Masterpieces of tradition
Description
What is Edo Kimekomi Dolls ?
Edo Kimekomi Dolls (called Edo Kimekomi Ningyo in Japanese) are mainly produced in Taito, Sumida, and Arakawa wards which are located in northeastern Tokyo. The doll’s body, arms, and legs are made of toso, a modeling material made of paulownia sawdust mixed with wheat starch paste. The head is made from dolomite clay, silk threads are used for hair, and the costumes are made from silk or cotton textiles. A distinct part of the production process involves cutting small grooves into the doll, and tucking the ends of costume fabrics into the grooves. These dolls have no separate items of clothing, instead, pieces of fabric are pasted onto the torso and tucked into the creases. Therefore, making the base shape is considered one of the most important processes, and can bring out the artisan's style. Edo Kimekomi Dolls have slightly narrow faces and well-defined facial features. They were first made using skills developed in Kyoto and brought to Edo (former name for Tokyo), but as the culture and fashions changed, the dolls took on the Edo style. The features of Edo Kimekomi Dolls are sharply distinguished, whereas the faces of Kyoto dolls are fuller and softer. Today, a wide variety of Edo Kimekomi Dolls are produced such as dolls for the Girls’ Festival or the Boys’ Festival, and ukiyo dolls (dolls reflecting the Edo culture). The toso material of the dolls make them light and easy to carry, while durable with little loss of shape.
History
The origin of Edo Kimekomi Dolls dates back to around 1736-1741 in Kyoto, when a Shinto priest of Kamigamo Shrine, Tadashige TAKAHASHI, used scraps of willow left over from woven boxes from shrine festivals to make dolls and dressed them with fabric remnants from priests’ robes. Since the dolls also originated in the Kamo area of Kyoto, they used to be called Kamo dolls, Kamo river dolls, or willow dolls. Later, when doll artisans began to market the dolls, they came to be known as kimekomi dolls as the term kimekomi refers to the tucking of fabric into grooves in the doll. Between 1711 and 1715, the doll production techniques were brought to Edo from Kyoto, and the doll makers developed the unique Edo Kimekomi Dolls. During the latter half of the Meiji period, there was a large shift in production methods from pasting fabric onto a wood-carved torso to the present-day technique of using molds and toso mix. This opened the possibility of mass production and a diverse range of kimekomi dolls were made in large numbers. Today, Edo Kimekomi Dolls are still handmade using old methods and have been designated as a traditional craft by the Minister of Economy, Trade, and Industry.
Production Process
- 1. Making a clay figure
A clay figure is made based on a rough sketch of the doll's design.
- 2. Mold making
The clay figure is placed in a wooden frame and molten sulfur is poured into the frame to make a mold of the doll. This mold is called kama. A mold of the front half and back half of the doll are made.
- 3. Making the base shape
Oil is applied to both halves of the mold, and then they are each filled with toso, a modeling material made of paulownia sawdust mixed with wheat starch paste. At the core of the torso, paper is stuffed as reinforcement to prevent any loss of shape. The pieces of the mold are put together to form one piece, any burrs are scraped, and the piece is removed from the mold. After thorough drying, any cracks, dents or flaws are fixed by applying toso with a bamboo spatula, and any roughness is filed smooth to complete the torso base.
- 4. Applying gofun
Gofun, a white pigment made from seashells, is dissolved by kneading with glue and is applied to the torso; by permeating into the torso and stiffening the base material, the mix prevents loss of shape, and also makes it easier to cut grooves and improves the color contrast of the tucked in fabric.
- 5. Groove carving
After the gofun has dried, grooves where the costume fabrics are to be tucked in, are carefully carved with a chisel. As this work will greatly affect the finish of the doll, it is important for grooves to be of a uniform width and depth.
- 6. Tucking in fabric
Paper patterns for each fabric piece are created and selected fabrics are cut to size. Kanbai-ko (glutinous rice glue) is spread into the grooves, and the fabric pieces are tucked in with a prick punch.
- 7. Making the head
For the head, toso, plaster, or bisque baked clay is used. When making with toso, the mold for the head also has a front and back, and toso, finer than that used for the body, is used and pressed into the two halves. In the same way as with the torso, a central hollow core is left. After fully drying, the head is filed smooth, and an undercoating of gofun is applied.
- 8. Applying gofun to the head
After the undercoating has dried, special gofun is applied to form the nose and mouth and is left to dry. Adjustments are made by shaving with a small marking knife, and a second coat is applied. The entire head is then covered with a thicker gofun and shaped. After drying, a damp cloth is used to wipe away any excess gofun. Then, the raised nose and mouth are carefully scraped to create the delicate facial expression. Using a brush, an overcoating of clear gofun is meticulously and quickly applied.
- 9. Painting the face
The eyes, lips, and other facial features are painted with fine-tipped brushes. Painting the face is said to be the most important work for doll-making, and by giving character to the doll, it greatly affects the finish.
- 10. Cutting grooves for hair
Grooves are cut in the head to attach hair.
- 11. Attaching hair
Black dyed silk threads are combed and hair tips are aligned and cut. Glue is applied, and starting from the shortest length, hairs are fixed into the grooves using a prick punch.
- 12. Fitting
During this step, the separately made head, any head adornments, accessories to be held, and other items are attached to the torso while taking into account the best angles for display.
- 13. Finishing
The hair is brushed and set. Small accessories are attached, completing the doll.
Representative Manufacturers
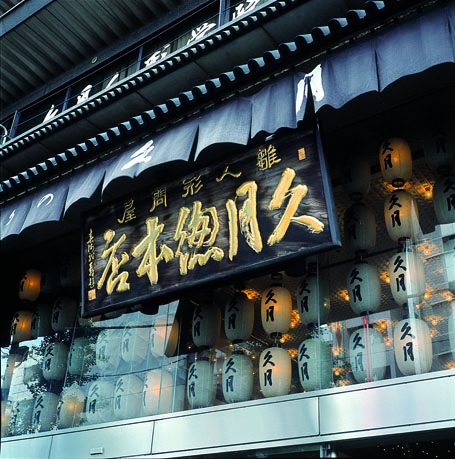
Kyugetsu Co.,Ltd.
-
Founded1835
-
DirectorHisatoshi Yokoyama
-
Address
-
Website
-
Tel.+81-3-3861-5511
Facility Information
Kyugetsu Asakusabashi Main Branch
-
Address
-
Tel.+81-3-5687-5176
-
Closedopen everyday
-
Business Hours9:30am to 5:15pm
-
AccessOne-minute walk from either the Toei Subway Asakusa Line Asakusabashi Station or the JR Sobu Line Asakusabashi Station
-
Website
Edo Kimekomi Dolls Related Artists
- You will be redirected to the artist's page on the Gallery Japan website
See list of artworks related to Edo Kimekomi Dolls ![]()
Other Dolls, kokeshi
- Hakata Dolls
- Iwatsuki Dolls
- Kyo Dolls
- Miyagi Kokeshi Dolls
- Edo Kimekomi Dolls
- Suruga Hina Dolls
- Edo Seasonal Festival Dolls
- Suruga Doll Accessories
- Edo Oshi-e Embossed Fabric Pictures
- Nagoya Festival Dolls and Decorations
Other Crafts Made in Saitama
- Site Map
- What is kogei?
- About us
- Contact Us
- Terms
- Recommended Environment
- Privacy Policy
- Company Profile
Related Sites : GALLERY JAPAN ![]()
KOGEI JAPAN All rights reserved.
top