


- Writing tools
- Hiroshima
Kumano Brushes Kumano Fude
180 years of history and skills
All for the perfect brushes
Description
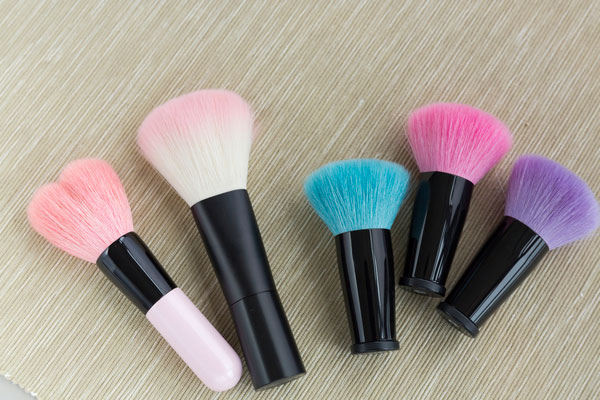
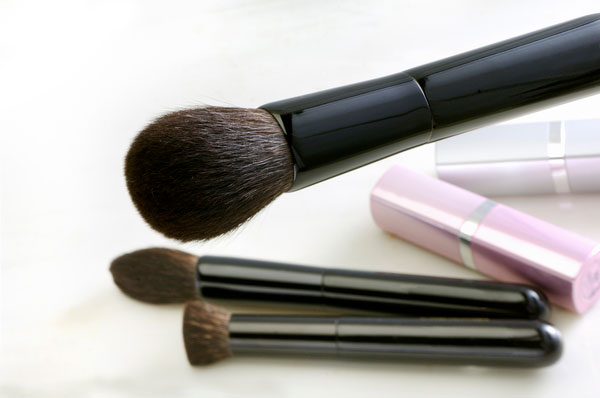
What is Kumano Brushes ?
Kumano brushes (called Kumano fude in Japanese) are traditional craftworks produced in the city of Kumano in Hiroshima prefecture, hence the name. They are made from a wide variety of hair including goat, horse, deer, Japanese raccoon dog, weasel, or cat. The shape of the brush tip is not cut straight but gently oscillated into a wooden mold, a distinctive characteristic of Kumano brushes. By making the best use of the natural properties for each type of hair, brushes with fine delicate tips with a moderate firmness are created. The only brushes that can claim to be authentic Kumano brushes are those with heads produced in the city of Kumano using the traditional manufacturing techniques such as using finely-powdered rice husk ashes to remove any trace of oil or binding the brushes with linen thread. Kumano is renowned for its government-designated traditional craft calligraphy brushes as well as the more recent production of paint and makeup brushes. Creating just one Kumano brush requires more than 70 production steps, most of them being handwork. To complete each process, years of training and experience is needed. It is especially difficult to select specific hair for a particular brush type and assemble them. Kumano is actively making an effort to train the next generations of brush makers in order to keep its heritage alive.
History
The history of Kumano brushes dates back to the late Edo period (1603-1868). Like many other rural communities, the chief industries of Kumano were agricultural, but being located in a basin with little arable flat land, during the winter seasons farmers worked as migrant workers in the Nara and Kishu regions. While on their travels it was common practice for them to peddle calligraphy brushes and inksticks. Then in the late Edo period, the three founding figures of the brush-making tradition appeared on the scene. The first, Tameji SASAKI, learned the art of brush-making in the Arima region in 1835 followed by Tsuneta OTOMARU in 1846. The third, Jihei INOUE learned his craft from a master in Hiroshima that same year. The trio passed on their brush-making techniques, which soon spread the seeds of the new industry. Backed by the Hiroshima domain administration, the new handicraft thrived. With the start of the Meiji period (1868-1912) came the introduction of a nationwide educational system, and production of calligraphy brushes increased to meet the expanding demand. However, the Second World War forced the suspension of production for a while. After the war, the art of calligraphy was no longer taught in schools, but manufacturers took the opportunity to add the production of paint and makeup brushes to supplement the slumped sales of calligraphy brushes. Later in 1958, calligraphy was put back on the school curriculum, which lead to the increase of demands for Kumano brushes more than before. In 1975, Kumano brushes were designated as a traditional craft, and in 2004 the brushes were registered as a collective trademark. Currently, Kumano brushes account for about 80% of the domestic brush production.
Production Process
- 1. Selecting the hair and assembling First, the best quality hair is carefully selected among unprocessed hair and is assembled. The volume of hair depends on the intended purpose of the brush.
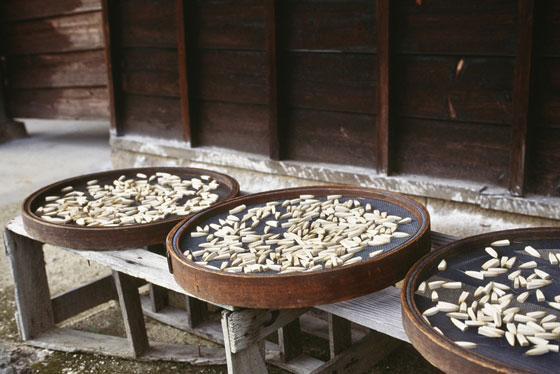
- 2. Heating and rolling the hair Rice husk ashes are sprinkled onto the hair and heat is applied to them with a flat iron. Then, they are firmly rolled in a buckskin (leather hide) and rubbed to remove any oil.
- 3. Arranging the hair The rubbed hair is removed from the buckskin, and combed to remove any unneeded hair. Small batches of hair are then stacked and evenly arranged.
- 4. Removing any imperfections Any damaged or puffed up hair is removed using a small knife called hanzashi.
- 5. Cutting
The hair is cut to the necessary length for the brush.
- 6. Mixing The hair is spread out and then mixed well with glue.
- 7. Making of the brush's core The hair is inserted into a spherical wooden brush head called a koma and the volume is adjusted to a set standard in order to form a brush shaped core with a pointed tip.
- 8. Wrapping the hair A thin outer layer of even higher quality hair is wrapped around the first set of hair and the core is set out to dry.
- 9. Tying a thread
A linen thread is wound around the base of the core and a hot iron is applied to solidify the protein of the hair and give shape to the brush.
The brush head is now complete. - 10. Selecting a brush handle A handle that suits the size of the brush head is selected.
- 11. Straightening The handle is gently warmed and softened over a fire before being placed into a straightener to remove any curves or twists.
- 12. Cutting the handle The appropriate length of the handle is determined then cut.
- 13. Attaching a cap to the handle A cap made of either celluloid or wood is glued to the end of the handle.
- 14. Lathe processing Using a lathe, the cap is shaped down to a size that fits the handle.
- 15. Polishing the handle After a rough, initial polish with water, the handle is waxed to make it shine.
- 16. Attaching a cord With an awl, a hole is opened in the cap end of the handle and a cord is inserted through it.
- 17. Adjusting the shape The piece for the grip holder, where the brush head and the handle meet, is rounded and adjusted to match the brush handle. It is attached to a lathe and rotated while being shaved with a specific knife.
- 18. Attaching the grip holder Some glue is applied to the handle before fitting the grip holder around it using a scraper.
- 19. Inserting the brush head The inside of the grip holder is evenly shaved and glue is applied in preparation for inserting the brush head.
- 20. Finishing touches
The brush head is hardened by vigorously applying glue paste.
Any excess glue is then squeezed out with a linen thread. After the head goes through final adjustments, it is left to dry. - 21. Engraving the maker's mark
A chisel is placed firmly on the handle and an inscription is engraved by moving the handle. Pigments are also applied to color the inscription.
This is the last step in making a Kumano brush.
Representative Manufacturers
Houkodou
At Houkodou, we create writing brushes, paintbrushes, makeup brushes and traditional brushes with baby hair. Our goal is to expand the culture of brushes.
Elementary school and Junior high school students often come visit our atelier to learn about brushes. Visits and workshops are available for all too.
-
Founded1900
-
ClosedAround the New Year and mid-August.
Atelier (2F) closed during weekends and public holidays. -
DirectorTomoko IHARA
-
Business Hours9am to 5pm
-
Address
-
Website
-
Tel.+81-82-854-0003
Koyudo atelier

Our goal is to preserve the traditions and culture of Kumano brushes while creating new, original and unique items that will keep on satisfying our customers over the years.
-
Founded1979
-
ClosedSundays and national holidays
-
DirectorFujimori UEMATSU
-
Business Hours9am to 5pm
-
Address
-
Website
-
Tel.+81-82-854-0418
Facility Information
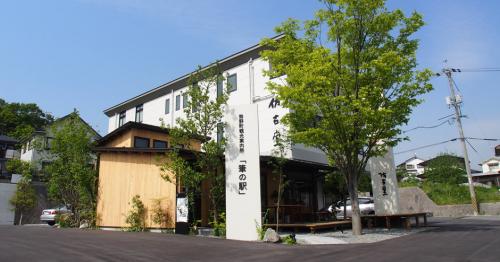
Fude No Sato Kobo
 Photo:Hiroshima Prefecture
-
Address
-
Tel.+81-82-855-3010
-
ClosedMondays (open on Monday if holiday and closed on Tuesday), around the New Year
-
Business Hours10am to 5pm
-
Website
Other Writing tools
- Kumano Brushes
- Ogatsu Inkstones
- Akama Inkstones
- Unshu Abacus
- Banshu Abacus
- Nara Brushes
- Suzuka Inksticks
- Toyohashi Brushes
- Kawajiri Brushes
- Nara Inksticks