


 Photo:Kumamoto Prefecture
- Metal works
- Kumamoto
Higo Inlays Higo Zogan
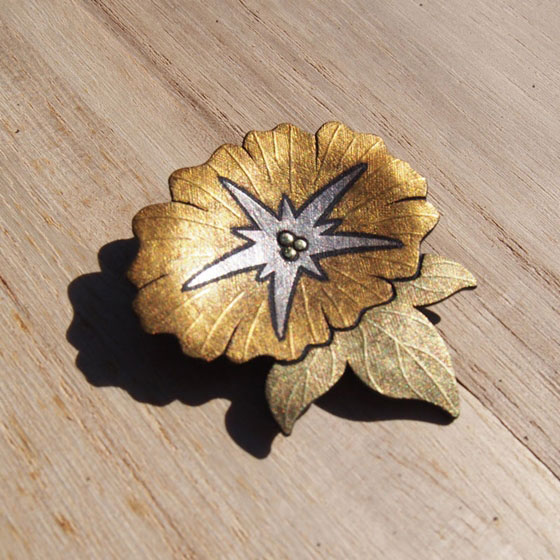
Gold and silver designs floating on black ink metal
Depth reflecting the splendor of samurai culture
Description
What is Higo Inlays ?
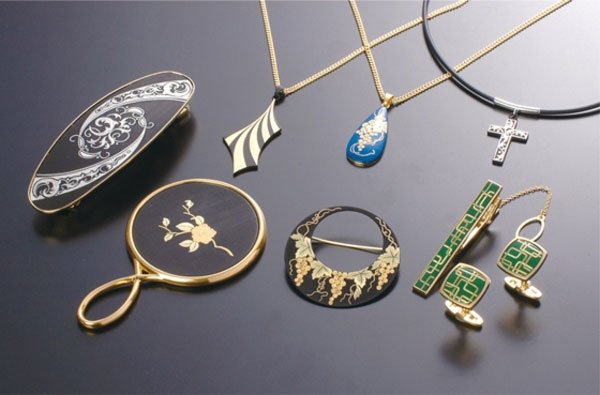
Higo Zogan is inlaid metal work produced in Kumamoto, Kumamoto prefecture. This craft was formerly used to adorn the gun barrels or sword guards of samurai. Today, however, the skills are used to make personal accessories or interior ornaments. The characteristic features of Higo Zogan are its simple dignified beauty and refinement, the quintessence of samurai culture. The beauty of the gold and silver design inlay is in contrast to the somber deep black base; a perfect balance giving each piece a restrained elegance. Higo Zogan involves several techniques such as the more commonly used nunome (meaning like a woven mesh) inlay or the less used horikomi (engraving) inlay. In nunome inlay, many intersecting fine lines resembling a woven fabric are engraved into the iron base surface, onto which gold or silver metal shapes and designs are inlayed. Traditionally, Higo Zogan does not use any paint on the base metal, and relies on creating a deep black color by allowing the natural process of rusting to bring out the beauty of the iron base metal. Other traditional techniques developed over the centuries make use of the thickness of gold and silver, and nunome chisel cuts that are made from four directions (vertical, horizontal, and diagonals), along with design motifs handed down in the Higo region to ensure the characteristic dignity and refined beauty of this craft.
History
Matashichi HAYASHI, a gunsmith in the beginning of the Edo period (1603-1868) is considered to be the founder of Higo Zogan. At first, he served Lord Kiyomasa KATO, but after the Kato family fell from grace in 1632, he worked for Lord Tadatoshi HOSOKAWA, the new lord of the Higo domain. After mastering the nunome inlay techniques in Kyoto, he began applying inlay patterns such as the nine-planet crest, kuyomon, or cherry blossom crests. Later on, Hayashi’s outstanding inlay techniques were used to make numerous fine articles, and became the roots of traditional Higo Zogan. Although Tadatoshi HOSOKAWA was the lord of the domain, his father Tadaoki had an enormous influence on the development of Higo Zogan. Tadaoki had a taste for elegance and refinement, in the pursuit of which he employed master artisans, such as Hikozo HIRATA, a blacksmith, and encouraged professional rivalry in the production of sword and metal fittings and the development of metalwork skills. In this way, under the patronage of the Hosokawa family, Higo Zogan developed its increasingly refined techniques along with the rise and prosperity of the samurai in society. In the closing days of the Tokugawa Shogunate, Rakuju KAMIYOSHI, who was considered a second Matashichi HAYASHI, enabled Higo Zogan to hold an established position in the world of metalwork. Unfortunately, with the Meiji Restoration and the law banning the wearing of swords, the demand for sword metal fittings disappeared overnight and Higo Zogan suffered a crippling blow. Even so, by using the techniques to make accessories and tea utensils, the industry found a way out of its difficulty, and these traditional techniques have been handed down to present.
Production Process
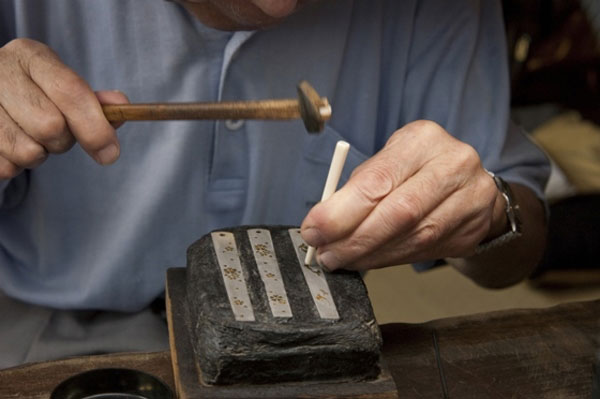 Photo:Kumamoto Prefecture
- 1. Making the iron base
An iron plate is cut and filed to the shape of the workpiece.
- 2. Polishing the iron base
The iron surface is polished by filing to remove any rust, dirt, or stains on the surface.
- 3. Preparing the iron base
The iron base is fixed into a work stand made of pine resin and stone powder. The iron base surface is filed and polished with sandpaper until the surface becomes smooth.
- 4. Drawing the design
After deciding the inlay patterns and layout, a design is either directly drawn on the base with a brush, or onto a sheet of thin paper, which is transferred to the base by using a graver. The artisans are free to display their creativity in this important process.
- 5. Nunome engraving
Using a hammer and graver, the base is engraved with fine lines in four directions: vertical, horizontal, and diagonal. These lines are called nunome. The lines are so fine, about 16 fit into a 1 millimeter square. Vertical lines are cut deep, while the horizontal ones are adjusted to be shallower.
- 6. Cutting out Motifs
Parts for the inlay design are made from gold, silver, or electrum (gold and silver alloy) sheets. A roller is used to make the sheet a uniform thickness, which is about four times thicker than that of Kyo Zogan (Kyoto-style inlay). This extra thickness gives Higo Zogan a dignified and imposing impression. Motifs are cut out from the metal sheet, placed on a dish, and heated to soften and increase the degree of adhesion with the iron base. This process is known as namashi.
- 7. Hammering
The motifs that have been cut out and processed are hammered on to the nunome (lines engraved in the base) using a deer antler and hammer. It is hammered carefully until the crisscross nunome pattern can be seen through the motif.
- 8. Hammering to firm
Any excess gold metal of the motifs are trimmed according to the design, and the metal surfaces are beaten with a special hammer until they are smooth. In this process the nunome patterns on the motifs disappear, and the iron base and the motifs will be firmly attached.
- 9. Polishing
The surface is rubbed for polishing, and is further beaten with the deer antler rod and hammer.
- 10. Erasing the nunome
A pencil-shaped iron rod is used to scrape away all traces of the nunome from the iron base, after which the surface is smoothened with a tool called kisaki.
- 11. Further polishing
Several types of polishing rods are used to smoothen the iron base surface to its original condition.
- 12. Hairline engraving
The detailed parts of the inlay design are completed using a hairline engraver, after which the surface is polished with an abrasive to finish the inlay work.
- 13. Preparation for rusting
The polished iron base is removed from the work stand and any resin and dirt on the surface is removed. It is then placed in a nitric acid solution diluted with water until the surface tarnishes slightly. Then ammonia is added to neutralize the solution. The iron base is removed and held under running water. This process creates a rough base surface, allowing rust to evenly develop.
- 14. Rusting
Liquid for rusting is applied evenly on the iron base surface, which is then heated over a flame to develop rust. After heating, the base is cooled and dried. The rusting liquid is again applied and the same process is repeated. As the development of rust varies depending on the temperature and humidity, it is important to make sure that the whole surface rusts evenly.
- 15. Preventing further rusting
The base is left for one night, and then boiled in tea for 30 minutes. The tannin in tea leaves neutralizes iron oxidation, stops the rusting, and also changes the rust color to the deep black color of Higo Zogan. The base is then removed and cooled with water. After draining, it is held over a flame until white smoke is produced, and the base is removed.
- 16. Heating
Camellia oil mixed with soot is painted on the base, and the base is heated again. By repeatedly painting and heating, a coat is formed on the surface and further rusting prevented. Finally, the surface is polished with camellia oil to beautifully bring out the gold and silver patterns. This is followed by shading or engraving to finish.
- 17. Assembly and completion
Any metal fittings or accessories are attached and the Higo Zogan item is completed.
Facility Information
Kumamoto Perfectural Traditional Craft Center
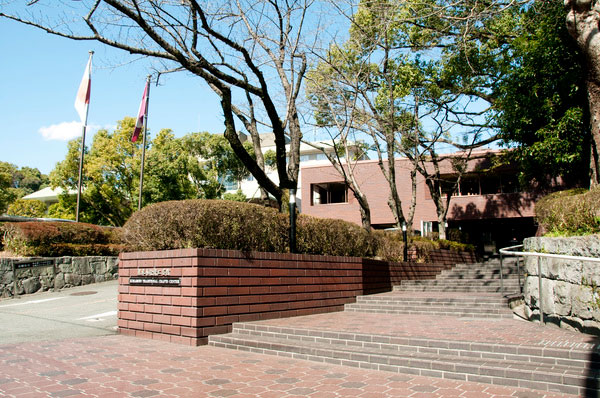 Photo:Kumamoto Prefecture
-
Address
-
Tel.+81-96-324-4930
-
ClosedMondays (open if Monday is holiday and closed the next day), December 28 to January 1
-
Business Hours9:30am to 5:30pm
-
Website
Higo Inlays Related Artists
- You will be redirected to the artist's page on the Gallery Japan website
See list of artworks related to Higo Inlays ![]()
Other Metal works
- Nambu Ironware
- Takaoka Copperware
- Yamagata Cast Iron
- Sakai Forged Blades
- Tokyo Silverwork
- Echizen Forged Blades
- Osaka Naniwa Pewterware
- Tosa Forged Blades
- Tsubame Hand-Hammered Copperware
- Shinshu Forged Blades
- Banshu Miki Forged Blades
- Higo Inlays
- Echigo Sanjo Forged Blades
- Echigo Yoita Forged Blades
- Chiba Artisan Tools
- Tokyo Antimony Crafts